We have just received word that the next production run of SNES & Genesis YPbPr cables has been completed and is en route to the port for sea travel to the USA. We are still aiming to get them ready for sale before this summer, as planned. We will be working on final pricing, quantity limits, and a sale launch date in the meantime. Once settled, this information will be conveyed to you in a future update.

The factory is in the middle of producing Genesis YPbPr cable adapters for use with the Genesis 1 & Master System 1. Alongside these adapters, which we've produced before, they are also creating the brand new adapters for Neo Geo AES & Sega Saturn. Once all three types are finished, the plan is to air ship them to us so that they will be up for sale at the same time as the YPbPr cables.

Regarding the PS1 adapters, we are leaning on some experts to help us design tests to measure the insertion/removal force requirements for the PS1 connectors. The factory requires this information before we are able to finalize a new design that doesn't have a death grip on the console's A/V port.

We've also resumed working on various aspects related to the design of the Dreamcast YPbPr cables. However, based on past data we recognize that our productivity on this will take a major hit during a month or two following the next SNES/Genesis YPbPr cable release date. This is when we will have to divert most of our resources toward providing technical support.


Posted
AuthorNickolaus Mueller

Here is the latest newz:

1) Work on the cables is progressing along smoothly. We received samples of the new build, and they tested perfectly. There were some minor cosmetic issues with the samples, but all appear to be easy fixes for production.

2) We submitted a purchase order last week for adapters to use with the Genesis 2 cable. These include more adapters for Genesis 1, as well as adapters for Neo Geo AES and Sega Saturn. Although the design and documentation is complete, we did not place an order for PS1 adapters. Upon further inspection and testing of the PS1 connector samples, we are not satisfied with the connector fit with certain models of PlayStation consoles. We are continuing to search for an alternative connector supplier and also exploring the possibility of having a new connector re-tooled for us.

3) B-Stock cable repairs are still on the to-do list. Sorry, it has been low priority compared to all our other development and factory support tasks.  We hope to get to this soon and will definitely post more info when we're ready.

4) We started a monthly podcast called The Retro Roundtable, that features us alongside Voultar's Mod Shop, db Electronics, and RetroRGB. The first episode aired Feb 18th. It is available on YouTube, iTunes, and Google Play. All of this is being compiled in a central location at: www.theretroroundtable.com   The podcast is streamed live on Twitch and YouTube, and we make announcements for the dates on Twitter and Facebook.


Speaking of which, if you don't follow us there yet, here are the links:
www.twitter.com/hdretrovision
www.facebook.com/hdretrovision

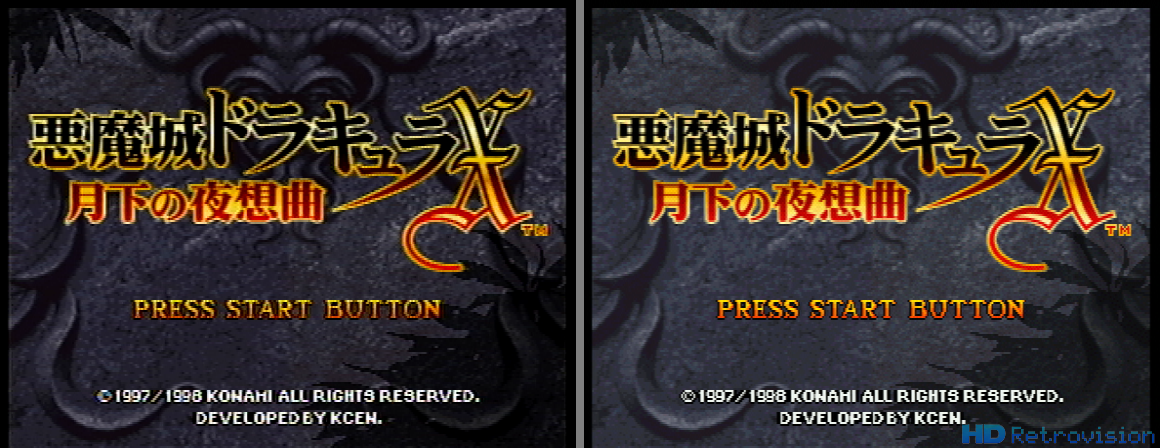
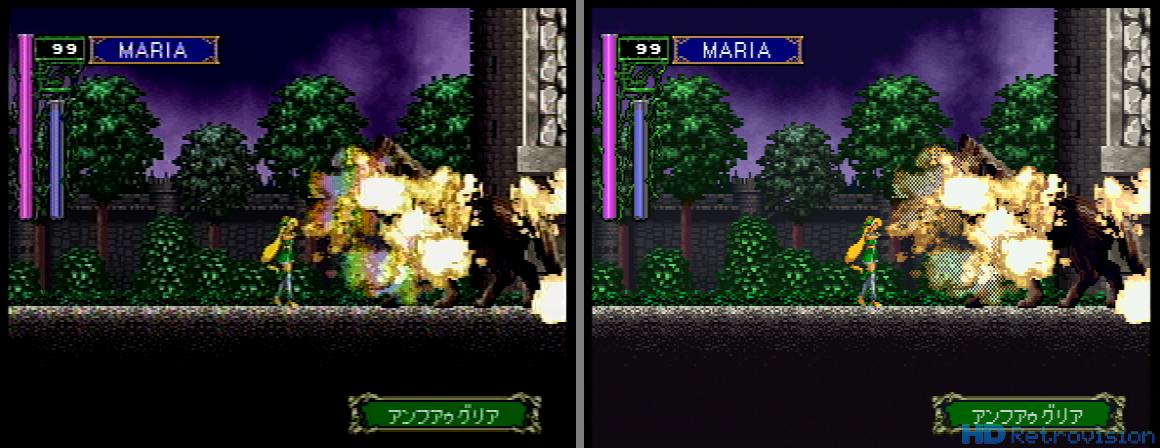
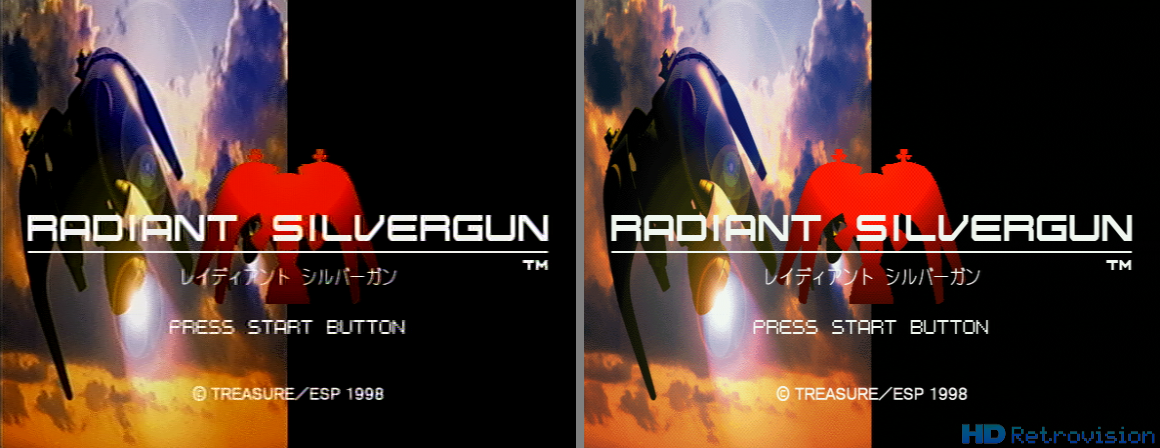
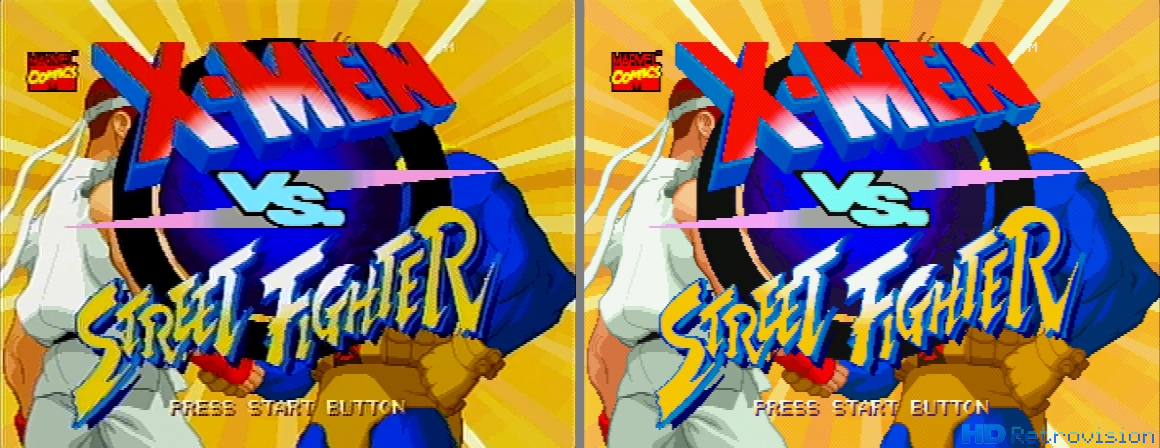
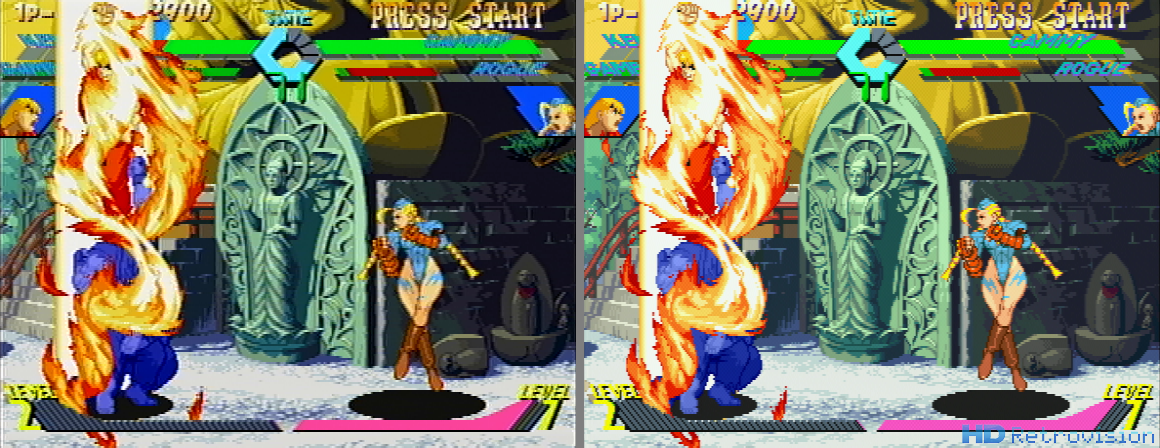
Now, enjoy some pictures of the Saturn adapter in action:

Posted
AuthorNickolaus Mueller

You may have noticed that we published Game Genie codes for Genesis along with the release of our last post. Here's how we did it.

Introduction

This blog post is a follow-up to our previous blog post, in which we demonstrated the method we used to derive Game Genie codes to get Super Mario World to run in 480i on the SNES. Here we will demonstrate the method used to derive the 480i Game Genie codes for the Sega Genesis, which is different enough that it deserves a separate treatment. We've already posted the Game Genie codes we've come up with thus far over on our Free Stuff page, so you can jump right to that if the technical details are of no interest. (Reminder: This is not intended for game play!) For the rest of you, let's go do some coding!

The Sega Genesis VDP

In our 480i SNES post, we showed how setting the least significant bit (b0) of register $2133 to have a value of 1 would tell the SNES to use its 480i mode instead of its 240p mode. The way this is accomplished on Sega Genesis VDP (Video Display Processor) is different. On SNES, the CPU has direct access to the register that controls (among other things) the interlaced vs progressive setting. Therefore, those settings can be altered with a simple command, like LDA $2133. On Sega Genesis, the register that contains these settings is not accessible in the same way. Instead, it lives inside the VDP which you must communicate with through a dedicated control port that sits at address $C00004. The best resource we have found that talks about how the Sega Genesis VDP works can be found here.

The relevant register that we need to alter is $0C - Mode Register 4. To communicate to this register, we have to write a word (two bytes) to the control port. The first byte needs to be the register we wish to alter, with one change: the most significant (left most) bit must be switched to 1. For $0C (written as 0000 1100 in binary) our first byte in the word will be $8C (1000 1100). For the second byte in our word, we write the new value we wish to set for that register. In register $0C, b2 and b1 are the bits that relate to the interlace vs progressive setting. When b2=b1=0, the Genesis will operate in its typical 240p mode. When b2=0 and b1=1, the Genesis will operate in 480i mode similar to what we did with the SNES (**SEE NOTE AT END**). Finally, when b2=b1=1, the Genesis will operate in a different 480i mode, the scope of which is beyond this post (think Sonic 2 versus mode). The last combination, b2=1 and b1=0, is undefined and should not be used.

The second byte in our word will depend on what is already being written to that register, since we don't want to alter the other bits. We simply want to change b1 to take on a value of 1 while leaving b2 as 0. The proper way to do this would be to add some code that ORs the current value of the register with $02 (0000 0010 in binary), but that would be very difficult or impossible to accomplish in 5 Game Genie codes. Instead, in the next section we'll use a tool to inspect the value that register $0C takes on in the unaltered ROM, and use that knowledge to flip b1 of that value to one. Anecdotally, every single ROM I looked at while experimenting with this procedure had a value of $81 (1000 0001) in register $0C before I started altering it. Flipping b1 thus resulted in the new value of $83 (1000 0011). When this is the case, it makes the word that we want to write to $C00004 the following: $8C83.

The Method

Fortunately for the enterprising Game Genie code developer, development on the Genesis is a bit easier (despite the fact that ramping up on how everything worked was a little harder). For starters, one main tool covers almost everything we need to be able to do: Exodus. I used v2.0.1 for this demonstration, and while I found it to be quite buggy, I was able to get by. 

Exodus v2.0.1 with VDP Register window

Exodus v2.0.1 with VDP Register window

After extracting the ROM from a cartridge using the Retrode, the first step we took was always to run the game to a startup screen, pause, and then open up the VDP Register monitoring utility from the Debug menu. This is where you can find out what value is currently sitting in register $0C (for Sonic the Hedgehog shown above, it is set to $81). This value is important for two reasons: (1) we know to look for $8C81 being written to $C00004 in the assembly, and (2) we use it to determine that $8C83 is the new value that we wish to write by flipping b1 from 0 to 1.

2.PNG

The next step is to use the Main 68000 Active Disassembly tool, also found in the Debug menu. As shown in the image above, we enabled data capture settings from $000000 to $004000 (this may need to be increased for some games). From there, simply reset the ROM and run the game to the first moment of actual game play. Once there, you can pause, press "Analyze" and output the result to an asm file. (Be patient! This takes some time and the file size is typically around 90MB.)

Now we have to deal with the trickiest part to this whole mess: finding where $8C81 is being written, and then overwrite it using the Game Genie. There are basically two scenarios to deal with. The first case, and the one Sonic the Hedgehog uses, is that the values $8C and $81 get plopped somewhere in memory and then read later on into $C00004. Using a decent text editor like Notepad++, you can open up the .asm file saved off in the previous step and start hunting. The search term I recommend looking for in this case is "$8C, $81". Once you've found all the instances of that - and for Sonic 1 there is only one - take special note of where it says something like "loc_000012A0:". This piece of information tells you where in the ROM that block of code begins. It's back to Exodus one last time to use the ROM editor to pin down where exactly $8C81 lives.

Starting from $012A0 on the ROM, we scan until we find $8C81 and then use our mouse to hover over the location. The tooltip that pops up tells us the address is $012B6. Just as in our previous post, we'll write the change we want to make in the format address : new value. The only difference is that for SNES a single Game Genie code overwrites a byte at a time, and for Genesis a single Game Genie code overwrites two bytes at a time. The only change we want to make for Sonic 1 is then 0012B6 : 8C83.

Game Genie Code Converter

Game Genie Code Converter

Just like we did for SNES, we'll rely on the Game Genie Code Converter to do the hard crunching from hex code to Game Genie code. This returns the only code needed to get Sonic the Hedgehog to run in 480i mode:

TNKA-A3F0

Let's try it out on real hardware!

We have to look at a different game to encounter the other scenario that I've found. In X-Men, the value $8C81 is written to $C00004 in a single line of "immediate" assembly code (the # sign) rather than storing the $8C81 in a temporary memory location and writing the contents of that location to $C00004. After applying all the same techniques up to opening the file in Notepad++,  a search for "$8C, $81" will fail. An alternative that works is to search for "#$8C81". One of the two locations it can be found on X-Men is shown in the image below.

6.PNG

From there we simply follow the same path of finding the exact locations using Exodus's ROM editor tool, and then rewriting the words at those locations to be $8C83 instead of $8C81.

Wrap Up

This post is intended to be useful for understanding the techniques used to derive 480i Game Genie codes for Sega Genesis, but it may not be complete. There may be other scenarios out there that I haven't come across, in which case the next steps I would take are (1) changing the search to look for "C00004" and trying to find relevant writes to the control port that way, and (2) expanding how much of the ROM you want to actively disassemble. 

**NOTE FROM STE** The Sega Genesis 480i mode has a slightly non-standard vertical refresh rate, and therefore may cause some compatibility issues with displays that reject anything that isn't at exactly 59.94 Hz. 


Posted
AuthorNickolaus Mueller

Welcome back to our technical series in blog posts. If you can bear with some coding details, the results of this are really cool. So let's jump into it.

Introduction

Back in the CRT days, most content was sent to the TV in 480i (interlaced). This meant that first the even rows were drawn top to bottom, and then the CRT gun would return to the top and fill in the odd rows on the next pass. More on that here. As you probably know, almost all SNES games play in a video mode that is typically referred to as "240p". This meant drawing picture on the even rows and leaving the odd rows black. This trickery is what allowed the full screen height to be refreshed at a rate of 60 times per second instead of 30 times per second (480i), and produces the well-known "scan line" effect. 

There are a couple reasons we'd like to be able to trick games into running in 480i instead 240p. Not included in those reasons is actually playing the game, since it will look terrible. Perhaps the most important reason to us is that it could help us with debugging issues customers might run into when using our cables. Content that is 480i will almost always result in a picture on modern HDTVs, whereas 240p sometimes is not compatible. If a customer happens to have a Super Mario World and a Game Genie, it would be nice to be able to send the TV 480i content from the SNES to see if the problem is with the cable or with the TV. You may have your own interesting reason for using this that we haven't thought of. Also, it's just cool.

In addition to video test cartridges (240p Test Suite or HDRV Factory Test Software), there is one commercial SNES game (R.P.M. Racing) that actually uses 480i instead of 240p. What these examples suggest is that software can be written to tell the console whether to output video in either 480i or 240p. This wiki page is a great place to start whenever you want to learn anything about SNES development. If you dig into the Registers page, you'll find that register $2133 is the SETINI - Screen Mode/Video Select register (Note: $ before a number means it's in hexadecimal). This section is actually quite dense for an 8-bit register, but we can skip most of it and head to the part relevant to this discussion, which is the least significant bit (i.e. b0, or the bit furthest to the right). When this bit is set to 0, the SNES will output 240p video. When it is set to 1, the SNES will output 480i video. Simple enough. So how do we exploit this?

Our plan of attack looks like this: take a Super Mario World (chosen because of how common this game is) ROM, run it through a debugging utility that parses the assembly/hex code as it runs, find any location that sets register $2133, alter the code to set b0 of that register to 1 instead of 0. (Note: HD Retrovision LLC does not condone any illegal use of ROMs and emulation.)  The rest of this article explains how we hacked a Super Mario World ROM into displaying in 480i, got it to work on real hardware via an EverDrive, and then finally created a set of Game Genie codes that allow us to get an actual Super Mario World cart to play in 480i as well.

ROM Hacking

We started by dumping the ROM from our Super Mario World cartridge using the Retrode. From there, the first tool that we used to accomplish this task is Geiger's SNES 9x Debugger. This is a great tool that allows you to do a few things that are very useful: step through code line by line, see hex side by side with 65816 Assembly, set breakpoints on the read/write/execute of specific registers, and even manually edit the hex if you want to. It's got more functionality than that, but those are the key ones for our purposes. In the screenshot below, you'll see that I used the tool to set a breakpoint at register $2133, stepped through several subsequent lines of code, and then eventually pressed "Run" again (at which point it stopped the next time it hit $2133). 

Geiger's SNES 9x Debugger

It takes a bit of playing around, but you can eventually figure out that what the Super Mario World coders did was have a block of code that they called as a function every time the game turns on, or a new level starts, or you return to the map screen. That block of code goes through and sets a bunch of important registers, including $2133. In this case they ran STZ $2133, which translates to "store zero in register $2133." This ends up being quite useful for us, because it means we only have to muck around with the code in one place and get register $2133 to look like "00000001" instead of "00000000". 

We could go directly to editing hex codes at this point, but that requires some more expert level thinking. More on that later. For proof of concept, we wrote some simple assembly code that we could insert into the ROM to accomplish what we need. At this point, it is important to understand that you can't simply just go throwing whatever code you want anywhere you want to do it. The code is laid out at addresses in such a way that it is expecting certain pieces of code to be in certain places. If you try to overwrite 3 bytes of code with 4 bytes, everything will break.

Here's a more concrete example: Starting at address $008A79 on the ROM, the next 3 bytes of hex look like 9C 33 21, which translates to STZ $2133 in assembly. We can't just go in and overwrite this with a LDA #$01 (load value 1 into accumulator) and STA $2133 (store accumulator value into $2133), since those together require 5 bytes (A9 01 8D 33 21) and not the 3 bytes used by the original code. If we did that, we'd either be inserting and shifting all of the code 2 bytes down, or overwriting whatever comes after STZ $2133. No good.

Unused space on the Super Mario World ROM

Instead, what we can do is jump to a subroutine at a different address (way out in empty space that isn't being used), run some code there, and then hop back. The address shown in the image above has a bunch of unused space, so we'll put it there. What we want to do is replace STZ $2133 with JSR $FFA0 (jump to a subroutine at $FFA0) which uses the same amount of space. Then at $FFA0 we'll insert our code and then return. Below is what that code looks like.

A couple quick notes: org is telling the assembler (the thing that turns words to code the SNES can understand) where we want to overwrite, and instead of directly jumping to an address we're just using a name (InterlaceBit) for the function, which the assembler will simply translate for us. RTS will return us out of the subroutine back to the place in code from where we jumped to this subroutine. How can we inject this code into our ROM? Well, we're off to another tool. This time we'll be using xkas. We put our patch1.asm and the original smw.smc file into a folder with that utility and run xkas patch1.asm smw.smc on the command line and we're done! To verify the patch has been written and is actually setting the interlace bit properly, we can use another utility called NO$SNS (I used v1.5 since Chrome thinks v1.6 is a virus) that gives us some visibility into various registers. Below is an image of the relevant section confirming our interlace bit has indeed been set.

NO$SNS I/O Map

Looks good, so let's write this ROM to an SD Card and go use it on an EverDrive to see if it will work on real hardware!


Game Genie Codes

The work in the previous section is important in that it proved that real hardware can indeed support this type of hack. However, it would be useful if we could accomplish this with a set of Game Genie codes instead. Unfortunately, this adds some constraints. Each Game Genie code can only change one byte of the ROM, and you are limited to a maximum of 5 codes. Just overwriting STZ $2133 with JMP $FFA0 would take three codes, and that's before we've written that whole subroutine. We're going to have to be more efficient, which suggests we should look for places where the developers were inefficient. If you're an assembly wiz, you might have noticed one such place back in the previous section where we stepped through some lines of code.

The developers have given us a gift in that LDA #$00 followed by STA $210B is equivalent to STZ $210B. This makes a possible patch very efficient: we'll change line $008A79 to STZ $210B, and use the inefficient code to instead execute LDA #$01 and STA $2133. Using the format address : new_value, we want to make the following changes.

008A7A : 0B (STZ $2133 -> STZ $210B)

008A8F : 01 (LDA #$00 -> LDA #$01)

008A91 : 33 (STA$210B -> STA $2133)

Now we just need to map these changes to Game Genie codes. There are several resources on the internet that describe the algorithm that converts these hexadecimal changes into game genie codes. It's interesting to learn, but incredibly tedious to perform by hand (not to mention it is incredibly easy to make mistakes!). Instead, I recommend using the Game Genie Code Converter. Here's what happens when you plug in that first code:

Game Genie Code Converter

If you repeat this process for the other two lines, you'll get the three Game Genie codes that will let you run Super Mario World in 480i (**see note at end**). They are:

D865-6464
DF66-67A4
776B-6D04

Let's try it out!


Wrap Up

Unfortunately, this is not an easily repeatable task that you can generalize to all games. We've come up with Game Genie codes for a few other games, but it ends up being quite difficult for most of them. We will be posting whatever codes we're able to find on our Free Stuff section. It's also worth reiterating that this is not really meant for using to actually play games, unless you like an ugly deinterlaced look. Additionally, to properly utilize 480i, you need to set the SNES's BG Mode to 5 or 6 to get 448 lines (R.P.M. Racing does this). Otherwise it just throws the 224 lines onto the separate fields which are spatially offset by 1 line and causes the jumpiness. Attempts to perform an additional hack for BG Mode 5 or 6 have been unsuccessful thus far.

Click here for more codes on both SNES and Genesis.

**NOTE FROM STE**   I am aware of two revisions of the SNES Game Genie. You can physically see which one you have only by cracking it open to read the version number on the circuit board. Alternatively, you can determine which version you have by how the code entering screen looks on boot: If the gold dashes are pre-populated on the codes, it is v1.0. If the gold dash only appears once you've entered in the fourth digit of a code, it is v2.0.

Depending on which revision of Game Genie you have, it may or may not work with your SNES revision. Based on testing, I reached a conclusion on compatibility between the v1.0 & v2.0 revisions. To make it easier, I'll break the various SNES consoles revisions into 3 families.

Family 1:  SHVC-CPU-01, SNS-CPU-GPM-01, SNS-CPU-GPM-02

Family 2: SNS-CPU-RGB-01, SNS-CPU-RGB-02, SNS-CPU-APU-01

Family 3: SNS-CPU-1CHIP-01, SNS-CPU-1CHIP-02, SNS-CPU-1CHIP-03, SNN-CPU-01 (mini)

With that in mind, Game Genie v1.0 only works with Family 1. Game Genie v2.0 works fully with Family 1 and 2, but only the top and bottom code lines work on Family 3 (the middle three lines are non-functional).

Posted
AuthorNickolaus Mueller

Hello again, everyone! It's been awhile since we've posted an update, but now that we've finalized things we can fill you in.

Over the last few months, we have been working to determine why some TVs appear more sensitive to sync jitter than others so that we might correct for this within our SNES & Genesis component cable circuitry. We had a hypothesis, but it took a while to gather the equipment and spend the time to actually prove it out before it was even possible to try to develop an efficient fix. We were able to confidently determine that the problem stems from some TVs not properly following specifications for standard definition content by triggering off of the wrong (rising) edge of the sync pulse. Those TVs that do follow specifications and trigger off of the falling edge don't exhibit any visual artifacts (horizontal "shakiness"), and those that don't follow specifications and trigger off the rising edge display varying degrees of shakiness. We plan to update our sync jitter page with a more in-depth explanation of our findings at some point.

After figuring out what was going on, we went down various paths of implementing an efficient fix to reduce the amount of jitter on the rising edge of the sync signal. If you've been following our progress since the Kickstarter days, you know that the constraints on this component cable project are very tight. In order to use our same manufacturing tools, the fix had to be small enough to fit within the same tiny circuit board area as before, and the test points could not move even a smidge so we could still use our existing factory test hardware. These are the biggest ones, but there were several others. After a couple months of design work, we were able to come up with an optimal solution that fit all our constraints. We had to quickly hand-build a small number of prototype circuit boards in order to re-verify the design, and we're glad to say that everything is working extremely well with the new changes.

OK, now that you've read the boring details, here's what you care about: as of today, we placed a purchase order for another batch of both the SNES and Genesis YPbPr component cables. We are not going to take any risks in predicting a timeline to much specificity, especially with Chinese New Year standing in our way. Our hope is to receive the next set of cables before Summer 2017 (possibly sooner depending on how things proceed), and will get them up for sale as soon as we can. The changes we've made to the design, as well as some additional steps in the factory process, have raised costs for us. Therefore, we expect prices to go up a bit as well. We're currently working on new pricing structures for our store to keep things as reasonable as possible while also allowing us to stay in business.

For those who don't want to wait that long, we are looking into another option for you. We have a very limited number of component cables in our "defect" pile that have various noncritical issues with them - some cosmetic, some with a broken stereo upgrade jack, etc.. But, as long as the cable tests okay otherwise, we are looking into options for selling these items prior to the next release. More to come as soon as we figure out how to proceed with that.

One more thing: while we've had some time to do work on the adapters for Sega Saturn, Neo Geo AES, and Playstation 1, we have a bit more work to do before we can finalize anything. We finally were able to find a source of connectors for all 3 systems (this took forever), so we should be in good shape once we determine that everything looks good with their design. This is the next phase in our work and we hope to be able to release some or all of these adapters simultaneously with the new component cable release. We then plan to move on to finishing development of a standalone Sega Dreamcast cable.

Lots of info there. Hope you enjoyed. Thanks for your support, as always.

Posted
AuthorNickolaus Mueller